Saturday, December 20, 2014

Almost there

I'm finishing my second cup of coffee before heading off to Walmart to procure the groceries for the week, and then I don't plan on leaving the house other than to go to and from work. Christmas preparations are almost done - today it's just regular chores like laundry and general housekeeping.

NO CHAIRS.

Wishing you all peace, and a little quiet.


Wednesday, November 26, 2014

Ghost of a Thanksgiving Past

Some 20 years ago, I was asked coerced convinced to prepare a modern Thanksgiving dinner in an 18th century manner in the home of said coercer host.  And oh, by the way, there would be a member of the British Embassy attending with his family, among others.

I came up with a menu*. I scaled the recipes up for the number of  people I was feeding, photocopied all the recipes, and put them in a binder. I made a master shopping list. I made a list of every pan, mixing bowl and utensil that I would need for each thing I was making. I made a timeline of what needed to be started when, when it had to go on the fire, what could be made ahead of time, and what had to be done last minute. I was as prepared as humanly possible for something I had never done before.


On Wednesday night, I made the cranberry sauce, and did as much food prep as I could. On Thursday morning, our host took himself to the grocery store to pick up the two fresh turkeys he has ordered previously, while I kept cooking.

He returned with two frozen turkeys.

He said they’d lost his order. The best they could do was send him back with frozen turkeys. Turkeys that were supposed to be on the fire in very short order. So I did the only thing I could think of. I named them John and Priscilla, and put them in the shower to thaw while I kept on with the meal prep.
The rest of the day was mostly a blur. I do remember that the turkey on the spit (Priscilla) cooked faster than the one hanging from the clock jack (John) so we rigged up a reflector with a sheet of something shiny.  I remember one of our guests coming in and taking pity on me and kneading the dough for the rolls. I remember the stiff upper lip when one of the Brits decided to try pumpkin pie for the first time and was very surprised that it wasn’t bad. I remember another member of the family helping with the washing up.


But mostly, I remember thawing John and Priscilla in the shower.


*Nut Breads (for nibbling while I got everything on the table)
Crab Soup
Roast Turkey
Dressing
Gravy
Mashed Potatoes
Sweet potatoes with lime juice, and nutmeg and rum
Scalloped Corn
Onion Pie
Bran yeast rolls
Honey Butter and assorted Jellies
Pickled Peaches
Cranberry Sauce
Gingerbread with Lemon Sauce
Pumpkin Pie with Whipped Cream
Ice Cream

And everything but the ice cream was made from scratch.
 
And wine, sherry and Port.

Monday, November 24, 2014

Update on The Chair

Crappy pictures in bad lighting ... but the faux Windsor chair got a couple of coats of "Salem Red" milk paint over the stain, the was lightly sanded and coated in polyurethane.

It's not something I ever would have started out to do on purpose, but I'm happy with how it turned out. The milk paint just looks right, and there is some nice depth of color.

 
This is the milk paint. It's very flat and chalky looking.
 
This is with a little sanding to smooth out the paint and expose a little stain, and with a coat of poly on top.
 
 
There is some nice depth of color now. A little sanding, and another layer or two of poly and we should be good to go.

 
I never would have planned to refinish this chair in this manner, but it suits the style, and I'm happy with it. Sometimes (rarely ...) the mistakes have happy endings.

Sunday, November 23, 2014

Getting there ...

Sweet Daughter's cloak is now about 95% finished. I just need to find the right ribbon for covering the neck seam so it doesn't rub.


The table is also done. Or, done enough for now. I'd like to get a smoother surface on it, but I need to find the right brush, or applicator.

 
Not a great picture, but I'm happy with the table.


I switched out two light fixtures -- the downstairs one more than once as I think the first replacement had a short in it. Replacement #2 went in easy-peasy. In part, because I figured out that one of those lights that clip onto the bill of your ball cap would help. Much better lighting that the floor lamp snaked in on an extension cord from the other end of the house.
 
I also decided the holly "bush" needed to be trimmed back. I couldn't get the hedge trimmer through it anymore.


It was so thick, I had to cut it down to see what was in it, so to speak. Arms are still like jelly ...

Any ideas what to replace it with? Southeast corner of the house, Zone 7.

This morning, I woke up and decided that compared to the refinished table, all my chairs looked like crap. So I decided to refinish one.


A 1940s Windsor-style chair with a faux mahogany wood-grain finish that was chipping off  gets covered in stripper ...


And it was ugly. Clear -- not a knot to be found, but ugly and blotchy. The turned pieces looked like birch. The seat is several sections of pine. I was brought up to believe that painting wood would send one directly to the fiery pits of hell ... so I tried staining it and hoping the pieces would sort of blend together.


Nope. Now it was dark and blotchy. So ... I decided to use milk paint on it. It's currently in process and I'm cautiously optimistic. And that is a post for another day ...

Now it's time for an adult beverage, some analgesic and a book.

Monday, November 17, 2014

In the middle

I'm still juggling three different projects. Nothing is done yet, but all are creeping closer.

I played Tetris with all the red wool scraps and pieced out a hood. I've got it lined, and I'm now trying to gather it to fit the neckline on the cloak which also needs to be gathered to fit. Then, I just have to decide if I want to bind the edges or not. It shouldn't be necessary, but this cloak is cobbled together from so many pieces, I think it would add some structural stability.


This brown linen project got test-pleated to make sure my math was correct for what size to make said pleats.


It seemed to work, so now I take all of them out, sew the two pieces together and start over, measuring very carefully this time.

Finally, the maple table is starting to look like I'm doing something right. I might even get it done this weekend. It's too cold and wet to work outside, or even in the garage, so I just decided that I'll have to clean and dust the first floor really well when I'm done.


And of course, all the regular housework is piling up. I'm keeping up with the essentials like laundry and groceries. but the clutter is piling up and driving me crazy. It's my own fault, but I'm hoping I can get caught up this weekend.

Right.

Sunday, November 9, 2014

Breakfast of Champions

I hate spending time cooking and cleaning up a decent breakfast, especially when I'm busy. My new favorite it peanut butter and bacon on graham crackers with a cup or two of coffee when I've got stuff to do. Like today.

I have three projects going at once. There's the relatively easy red cloak (unless I just jinxed it), another sewing project (more on that later if it works) ...


... and a table I'm refinishing.  My current dining room table is just too big for the space, and I picked up a smaller oval table on Craigslist for a song. It turned out to be a post WWII maple table, and for some insane reason, I decided to refinish it. The legs had mellowed to a lovely golden color, but the top had a slightly greenish cast to it that was so popular at the time. I've gone from the "!#$&^#!! WHAT have I gotten myself into?" stage to the cautiously realistic stage.


Once it warms up a bit, I'll be hauling all of this back outside to work on, but until then, I've got plenty to do inside, including drinking that second cup of coffee.

Friday, November 7, 2014

Bits and pieces

Sweet Daughter picked up a pocket while in Williamsburg last year and asked that I make her another so she'd have a pair. Since, near as I can tell, 18th century pockets had their edges bound in tape so as to keep loose threads from getting tangled up with the stuff in your pockets, that's how I made her new red one. I reworked the CW one as well.


Tonight, I decided to see if the math part of my brain was working ... a dear friend had given me a cloak which had come from one of her very best friends. She was a tiny woman, and my friend thought SD might like it. She mentioned that I'd probably have to do something with the hood ....

I wish I'd taken a picture of it as I pulled it to pieces. It was the absolute epitome of cutting your coat to fit your cloth. Or making lemons out of lemonade ... or something. It was made of four vaguely trapezoidal pieces of glorious scarlet broadcloth, stitched together to make a wide rectangle, and then roughly pleated onto a collar of epic proportions. The hood was shaped like the mouth of a frog. I have no idea if it was remotely functional. This was clearly bodged together out of leftovers from another project. Nothing had been trimmed down, or squared off or anything, but it was warm, and functional and of lovely wool.

So, I pulled it to pieces and washed it, hoping it would full up a little more. Tonight, I started squaring up the pieces. I probably lost a good 4" of width on each one. This made me nervous. When I was done, I sat down with every 18th century cloak pattern I could find, and settled on the one from "Costume Close Up". It had and illustration of the pattern laid out to scale. I ended up pulling out my architects rule I've been hauling around for 30 years and used it to scale the pattern to fit the panel I'd assembled. It's probably 10% smaller than the original, and should fit SD well.


I'll let it hang for the weekend and let it finish stretching before I cut the hem even. If all goes according to plan, I should have enough to piece together for a hood. Keep your fingers crossed ...

Thursday, November 6, 2014

More catching up

After the frenzy of getting two new outfits ready for the Renaissance Fair, we decided to pull some old stuff out of the closet for "Charter Day" in Port Royal. Of course there was a pirate theme, and everyone was encouraged to dress up.

 
They hired somebody as a Jack Sparrow impersonator who pretty much just walked around in blue jeans, motorcycle boots, a wig and eyeliner. No, I didn't laugh. At least not out loud.
 
 
If you ignore the "sexy pirate" Halloween costumes, I was the only adult dressed as a pirate who wasn't on the payroll. I did enjoy showing the local law enforcement my cutlass and boarding axe. One offered to trade me his asp for the axe. I declined. We didn't stay long as there wasn't a lot to do, but I got to try Stout-flavored ice cream.
 
The next day we decided to take advantage of the beautiful weather and the fact I'd finished up a new, larger jade-color gown for Sweet Daughter and we headed to Williamsburg for the day. I didn't really get any good pictures of it, as it's still a little large. Hopefully it will still fit her in the spring. She's going to need a new shift, though.
 

 There were a lot of visitors that day and they all wanted our picture. When we still hadn't made it into town after an hour, we gave up and rode the bus. We had a lovely day, and as we were waiting to take the bus back to the Visitor's Center, an orange sports car drove past, came to a stop, screeched into reverse and stopped in front of us. Yes, this was on a regular street. The driver jumped out (car still running), explained he was from Mexico and asked to take his picture with me.


I don't know why ... I probably looked like I wanted to chew his head off. I was feeling mighty done in by that point.

Wednesday, November 5, 2014

Getting caught up

I finally have a functioning laptop. After mine going Tango Uniform 17 months ago, and the one my IT guy loaned me no longer able to get updates (Vista), I finally bit the bullet and picked up an inexpensive refurbished one. Sweet Daughter was very generously sharing hers with me, but was putting in lots of hours on homework, and I just didn't have much access to it. Also, hers is getting along in years, and I cringed at the thought of it dying the night before an important report was due. Now we've got back-up.

Anyhow ... SD wore her "Lucy" gown to the MD Renaissance Fair. This was back in September.

Here she is doing her best River Tam impression at the May Pole.
She asked that I go in costume, too, so I made a stab at an Italian Renaissance gown.

Blessings upon the woman who showed me how to properly tuck up the skirts so I could walk without breaking my neck.
We watched jousting and weapons demos and musical performances.


These four guys are Cu Dubh. Percussion and bagpipes and volume. What's not to like?
Towards the end of the day I came across Dagger Dan's. I wish I'd found him earlier when I had more disposable income.


He has all manner of knives and swords.

 
I did find this lovely little piece, and decided that it might be the first in a collection of kriss blades. Because reasons.

 
All in all, it was a great girls day out, and I hope we'll do it again next year.
 

Thursday, October 2, 2014

Time for a musical interlude

Sweet Daughter asked me what a flow chart was during breakfast this morning. I tried to sketch one out, but didn't have time to go into great detail.

"Remind me when I get home" I said.

So, this afternoon after homework was completed, we pulled up this video:


Then I showed her this chart:


And then we took a tour of early New Wave music via the internets while dancing our heads off.

It was a good evening. And she knows what a flow chart is.

Monday, September 29, 2014

This is why ...

This is why I can't do SCA, or Steampunk, or LARP.

Friday, September 19, 2014

Yeah, I've been busy.

The skirts ... yeah. I forgot to remove the extra 4" from the waist and ended up with 4" of overlap in the back. It looks fine, and I talked myself out of taking it all apart and re-cutting it. I wish I'd gone with a lighter weight fabric (a drawback of ordering online is not knowing exactly what you're getting), but Sweet Daughter is happy with it, and it works.


And then I got to learn to work with Naugahyde. It wasn't as awful as I thought. We made a belt (buckle courtesy of a 75 cent thrift store belt), a sheath for her wooden dagger and a pouch.


We're going to the Renaissance Faire tomorrow. Did I mention Sweet Daughter wanted me in garb, too? Yeah. That's a story for another day. But they're just costumes ...


Wednesday, September 10, 2014

The Lucy ... undergarment

I don't know what to call it ... Shift? Chemise? Shirt? Shirt is probably closest, as it's rather ... abbreviated.

The fabric we found in the slightly greenish color we wanted (it very quietly sets off the dark orange very nicely) was in rather short supply. There was maybe a yard and a quarter or so, but we grabbed it, and I figured I could always piece some muslin or something onto the bottom where it wouldn't show.

I scaled down the pattern I'd used for my camicia (Italian shift) and realized we were still short fabric. So instead of folding the fabric length-wise, I folded it width-wise. This is a pattern with raglan sleeves (the sleeves and shift front where the sleeves attach are cut at an angle, instead of more fitted, set-in sleeves) and I planned to use the finished selvedge edge of the fabric around the neckline opening.

After washing and drying, I had about 42" of width (turned sideways, so now it was length) to work with. I cut the body 30" long, and the sleeves 12" long, figuring they'd be hidden under the velvet sleeves anyway. I carefully folded the sleeve portion over twice, so I could cut both sleeves at once and guess what? Bad news: I cut from the wrong folded edge. Good news: I stopped when I realized what I was doing.


I had to flip the sleeve around so the mis-cut armhole was now on the hem edge, and I could cut the armhole correctly. That part about the finished edge forming the neckline was right out the window and I didn't have any matching thread, so I improvised. The undergarment in the movie has a very subtle X pattern embroidered around the edge, IIRC. Instead, I turned the edge over and used an embroidery stitch over the raw edge in a slightly darker shade of green.


The outside edge is visible on the left, the inside portion is the vertical part on the right. The ivory-colored tape is the casing for the ... elastic. Yes, ELASTIC. Not a drawstring. Get over it.

The next step, was to fix the armhole cuts in the sleeves. I simply took wedges out, removed some of the fullness and called it a day.


The finished garment is long enough to come down to mid-thigh, and the sleeves won't show under the finished bodice.


It's a little more full around the neck than I'd like -- I should have cut it on an A-line, but lesson learned. The only bit that's going to show is the ruffle around the neckline of the bodice, anyway. It's just a costume, remember?

Tuesday, September 9, 2014

Fabric choices

The fabric for the Lucy dress mostly came online from Fashion Fabrics Club. (And I paid for every last inch of it, including the hefty shipping fees. Fabric is heavy.) I went with them, honestly, because they had the dark orange velvet for the sleeves, and when I started poking around they had most of everything else, as well.

Starting from the top ... sleeve lining from Joanne's. This is visible here:


Next ... the bodice fabric. We went round and round on this one.


This really looks like an unbleached linen with a print on it to me. I couldn't find anything like this. I looked for printed linen, embroidered linen ... I even thought about trying to print or embroider it myself, but I had a brief flash of sanity and dismissed the ideas. I could have gone with the plain, unbleached linen, but FFC had and embroidered silk on sale for less than what the linen cost, so we went with that. It was a bit of a crap shoot, as the picture looked like the unbleached linen, but the description said "copper", but it looks like it will work out just fine.

The white is a cotton/rayon twill for the underskirt.


The velvet is for the sleeves, obviously, and I had forgotten just how much I HATE working with synthetic stretch fabrics. I was very creative with my vocabulary there for a bit.

Next up is the shift/chemise/undershirt whatever-you-want-to-call-it fabric. You'll notice in the bodice picture it's a sort of greenish color, and has a very subtle embroidery design around the neckline. We picked up a piece of quilting cotton, again at Joanne's, and had to get rather creative on cutting it out. More on that later ...

And, at the bottom of the pile, is the dark orange twill overskirt fabric. Close inspection of the photo indicates that it's a silk dupioni to me, but I couldn't find any the right color. And the cotton was much, much cheaper. Heavier, too, but that was a compromise between availability, cost and how the final product would drape.

Besides, it's just a costume, right?


Sunday, September 7, 2014

The Lucy Dress - making the pattern

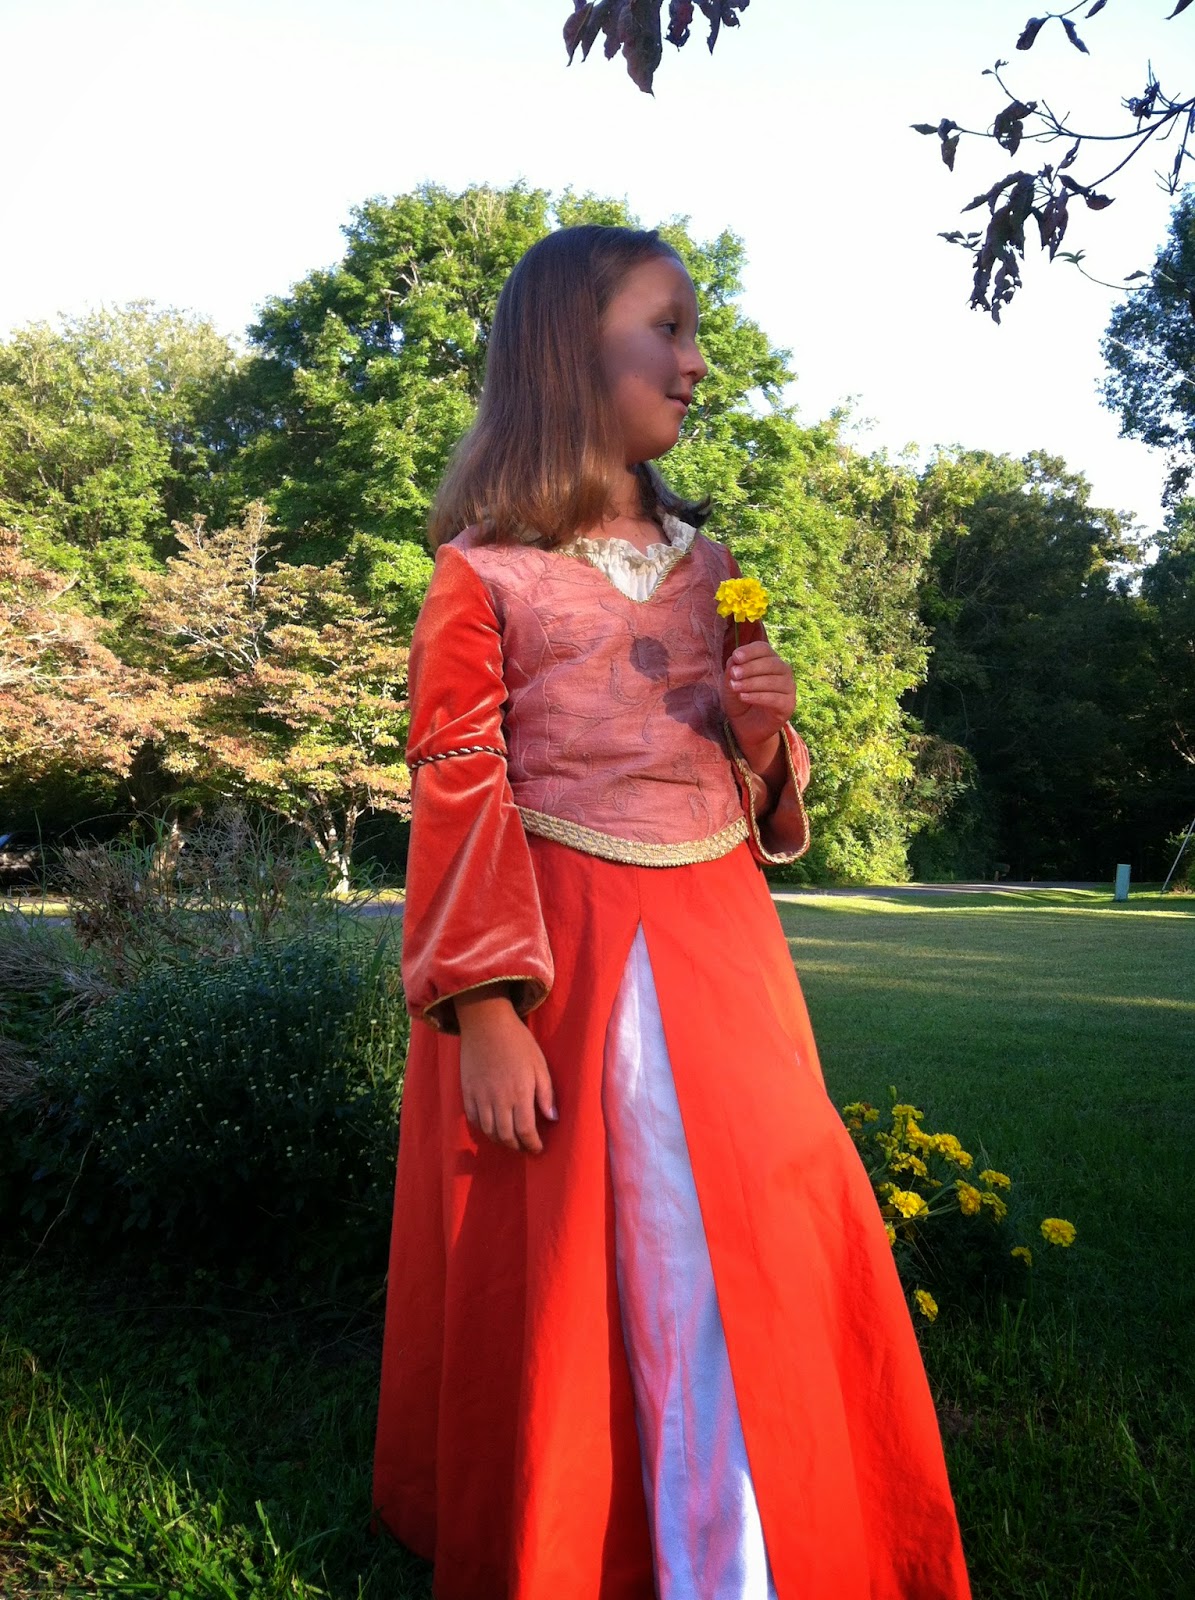
So, if you look at the picture of the Lucy dress, you'll notice princess seams through the bodice, and four panel skirts. The sleeves are fitted at the top, with a bell on the bottom section. I had to decide if I was in "artistic" mode - like when I made the white cross-barred muslin dress and just sort of winged it, or if I was in "math" mode and needed a known starting place. When I thought of the set-in sleeves, I opted for "math" mode.


Apparently people don't sew clothes for pre-teens to wear anymore, judging by the dearth of patterns. I ended up with the only thing we could find that was close. And it was in a woman's size. Definitely not designed for a 9-year-old, but it was a starting point.


Princess seams? Check. Set-in sleeves? Check. Four-gore skirt? Easy fix. We were on our way.

The first thing I did was compare Sweet Daughter's measurements to those on the pattern. I noted the "ease" allowed - 4". Since the bodice was to be snug, I had to eliminate those 4". And since this was designed for a "mature" figure (meaning a waist much smaller than the bust line) I had to make some changes. Since I needed to remove 4" from the chest, but none from the waist, I decided to remove an inch each from the center front and back, and a half inch from the side front and side back pieces. So, I made a quarter inch fold in each of the side pieces at the top, tapering down to nothing at the bottom. I made two of those on the center front and back pieces - one down the center, and one through the shoulder. I also compared the back-waist length from the pattern to SD, and remembering fitting issues I've had in the past, removed the excess from the armseye. I also managed to make these same alterations to the sleeve. It went something like this:


I put some gridded pattern making stuff over the pattern origami, traced my new cutting lines and had new pattern pieces.


These were cut out of scrap fabric (okay, a sheet that's older than I am that has done past duty as a drop cloth), sewn together and checked for fit.

Notice the difference in the curve of the back piece.
 Lines were drawn, notes were made and another set of pattern pieces made. Another fitting muslin was cut out and sewn, and we nailed it on the second try. Even the sleeve fit! Well, the top half.


And I continued to sketch out the necklines and alter as necessary.

The bottom half had to be drafted. I started with a rectangle as wide as the measurement of the bottom of the sleeve. I looked at the picture of Lucy, and made a SWAG that the bottom of the sleeve was 1 1/2 times the width of the top of the sleeve. I also guessed on the length, as SD wasn't around, so I couldn't measure her. I then drew lines every inch, vertically across the paper.


I cut on the lines, and put the slashed piece on another piece of paper. I spread the bottom of each piece a half inch from the next in order to widen the bottom by 50%.


I traced the new outline on the bottom piece of paper and made a new pattern piece.

I could not get this to rotate properly for love nor money.

And ... it worked. Well, it was about an inch short, but that was an easy fix when it came time to cut things out for real.


The skirts were much easier. I taped the center and side pieces together, and cut both the center front and center back so they were on the selvage, not a fold. I forgot to remove those extra 4" of ease (D'OH!), so there's some extra overlap in the back, and a bit of puckering on the waistband, but that's all hidden by the bodice, so I resisted the urge to take it all apart and recut it. It's just a costume, right?